How to Make a Metal Detector
Hey! Look what I got! Is this supposed to be a weed wacker or a metal detector? I think it's a metal detector. Let's turn it into a metal detector. I had to get riddle of the bubbles. for science. Here's how you use it. Hold the trigger to scan, point at some metal,and the pitch changes. Now in this unit, there was a fancy motor with spinny lights that I wanted to keep intact. So I decided, if you struck gold, then it'll give you a damn good light show. it's just a Blackberry. So here's how it all works. When you connect a capacitor and an induct or together, AKA an LC circuit, they start charging each other back and forth, creating an oscillating current. Now, if we use a really big coil, we can change the inductance of the coil by changing the permeability of the air around it. The change in inductance will change the frequency of oscillation. And this is what happens, when metal comes close to it. Now, if these components were perfect, they would charge each other forever and ever.
But they aren't. So in reality, our oscillation actually dies down. To fix that, we're going to add a single transistor amplifier to create a feedback loop in the LC circuit. Now this whole thing, is called the Colpitts oscillator. And with that, we now have a steady, usable oscillation. But! It's not over. The frequency of oscillation is in the 100kHz range, which means it's nothing that we can hear.
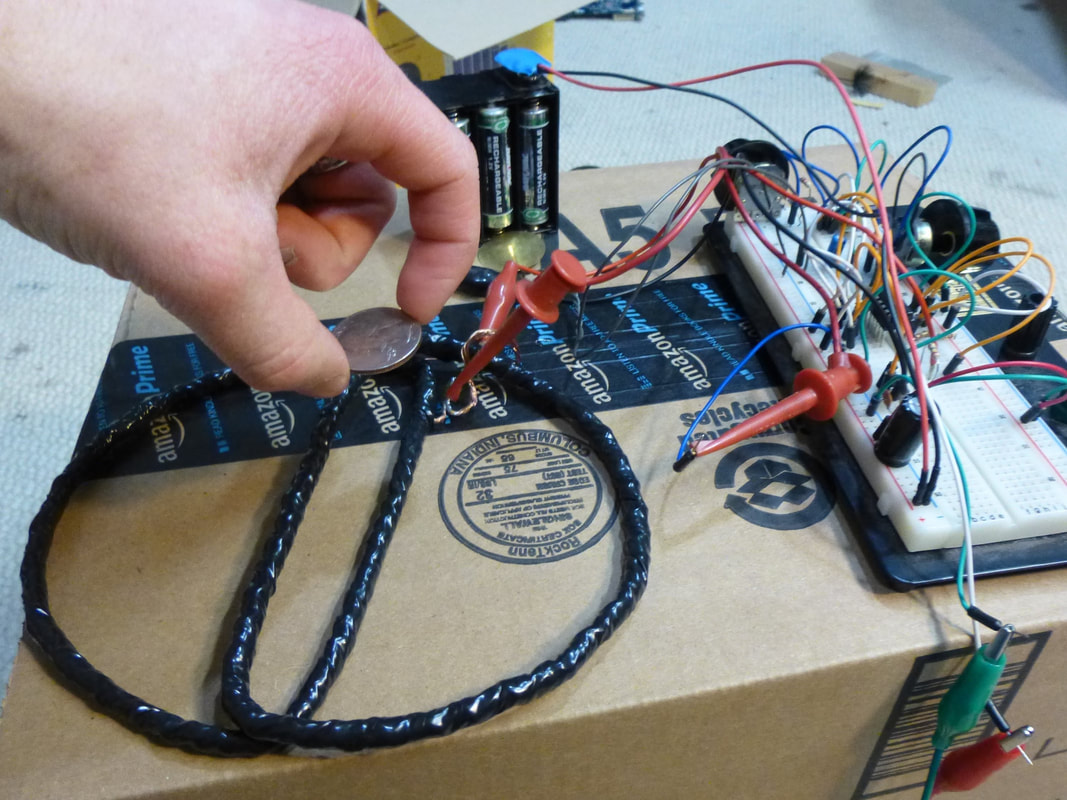
So what do we do about that? Arduino to the rescue! We're going to feed the oscillation into a counter. And when the trigger's pressed, the Arduino program will translate that oscillation into an audible tone, that gets played out the speaker. And just for fun, when our oscillation exceeds a certain threshold, we're going to turn on our light show, because. why not? We're also going to add a dial on the side to adjust the sensitivity. And we'll use this button to set the base tone. We'll look at the schematics at the end of the video. But for now, let's build stuff! Okay! First thing we have to do is embed a coil into the base. Take a spool, take some wire, give it 50 wraps or so, then we cut a hole into the base and drop in a spool. Done! Now let's open the housing and see what we got. Not going to need that circuit board anymore,so. get out of here! We're replacing the circuit with our own circuit board. There's nothing on here. Oh right! Let's put our oscillator in place.
Just like that. There we go! Now let's go over to the Arduino and upload some code to it. Then lift off the chip with our code and embed into the circuit board. Like this! Now let's go over to the junk pile, salvage another transistor to drive the speaker, and salvage a mosfet to drive the motor. Add them to the circuit board as well, and now, it is ready my lord. Back to our metal detector! There wasn't a dial here to begin with, but that's okay. We'll just blow a hole on the side and add one ourselves. Let's plug everything into our shfancy-shpancy new circuit board. Pop in some batteries, and give it a test. Hey, if you're interested in building one of these things for yourself, then here's the full schematics I used for this project.
But they aren't. So in reality, our oscillation actually dies down. To fix that, we're going to add a single transistor amplifier to create a feedback loop in the LC circuit. Now this whole thing, is called the Colpitts oscillator. And with that, we now have a steady, usable oscillation. But! It's not over. The frequency of oscillation is in the 100kHz range, which means it's nothing that we can hear.
So what do we do about that? Arduino to the rescue! We're going to feed the oscillation into a counter. And when the trigger's pressed, the Arduino program will translate that oscillation into an audible tone, that gets played out the speaker. And just for fun, when our oscillation exceeds a certain threshold, we're going to turn on our light show, because. why not? We're also going to add a dial on the side to adjust the sensitivity. And we'll use this button to set the base tone. We'll look at the schematics at the end of the video. But for now, let's build stuff! Okay! First thing we have to do is embed a coil into the base. Take a spool, take some wire, give it 50 wraps or so, then we cut a hole into the base and drop in a spool. Done! Now let's open the housing and see what we got. Not going to need that circuit board anymore,so. get out of here! We're replacing the circuit with our own circuit board. There's nothing on here. Oh right! Let's put our oscillator in place.
Just like that. There we go! Now let's go over to the Arduino and upload some code to it. Then lift off the chip with our code and embed into the circuit board. Like this! Now let's go over to the junk pile, salvage another transistor to drive the speaker, and salvage a mosfet to drive the motor. Add them to the circuit board as well, and now, it is ready my lord. Back to our metal detector! There wasn't a dial here to begin with, but that's okay. We'll just blow a hole on the side and add one ourselves. Let's plug everything into our shfancy-shpancy new circuit board. Pop in some batteries, and give it a test. Hey, if you're interested in building one of these things for yourself, then here's the full schematics I used for this project.
